Fire Prevention Day exists both to raise awareness of practices that can help prevent these disasters, and to recognize the work of the fire-fighters who relieve them. It is also often used to commemorate particularly famous and devastating fires in individual communities, such as the Great Chicago Fire in North America. According to legend, this fire was started when a Mrs O’Leary’s milch cow kicked over a lantern in her shed.
Fire Prevention Days have kicked off with slogans such as ‘Fire Feeds on Careless Deeds’ and ‘Don’t Give Fire a Place to Start.’ During the celebration, people congratulate fire-fighters and promote various fire-prevention and fire-safety material. Examples include the ‘EDITH’ (Exit Drills In The Home) acronym, which encourages families to have an escape strategy planned in case of fire; drives to install smoke alarms and check them regularly, and awareness of other danger-spots for fire, from unattended candles to cooking stoves.
Word of the Day
| |||
| Definition: | (noun) A power tool used for sanding wood; a loop of sandpaper is moved at high speed by an electric motor. | ||
| Synonyms: | smoother | ||
| Usage: | After tearing up the old carpeting, they used a sander to smooth the splintered hardwood floor. | ||

History
| |||
 | A supernova is a rare celestial phenomenon involving the explosion of a star, resulting in an extremely bright, short-lived object that emits vast amounts of energy. The last supernova to be observed in the Milky Way was seen in 1604 by Johannes Kepler and was used by Galileo, at his trial, as evidence against the presupposition that the universe never changes. Visible to the naked eye, it was brighter at its peak than any other star in the night sky. | ||
| |||
 | Del Toro is an Academy Award-nominated Mexican filmmaker whose films often explore the darker elements of fantasy and reflect his fascination with "insects, clockwork, monsters, dark places, and unborn things." His most acclaimed films to date, Pan's Labyrinth and The Devil's Backbone, both feature children living under authoritarian rule while facing frightening supernatural entities. | ||
| |||
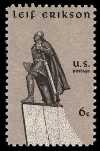 | Some historians believe that the viking explorer Leif Ericson landed in North America 488 years before Columbus sailed into the New World. Members of the Leif Erikson Association chose October 9 to commemorate this event because the first Norwegian emigrants landed in America on October 9, 1825. In 1964, PresidentLyndon B. Johnson proclaimed this as Leif Erikson Day. States with large Norwegian-American populations often hold observances on this day, as do members of the Sons of Norway, the Leif Erikson Society, and other Norwegian-American organizations. | ||
| |||
| We know some dinosaurs had feathers, but there remains plenty of debate over whether prehistoric birds such as Archaeopteryx could actually take to the air and fly | |||
 | |||||||
1701 - Collegiate School of Ct (Yale U), chartered in New Haven

1855 - Isaac Singer patents sewing machine motor

1872 - Aaron Montgomery started his mail-order business
1888 - Washington Monument opens for public admittance
1890 - Start of Sherlock Holmes adventure "Red-Headed League"
1915 - Woodrow Wilson becomes first US President to attend a World Series game
1938 - Aaron Copland's & Eugene Loring's ballet "Billy the Kid" premieres in Chicago
1946 - First electric blanket manufactured; sold for $39.50
1965 - Beatles' "Yesterday" single goes #1 & stays #1 for 4 weeks
1985 - Central Park's Strawberry Fields, dedicated
2012 - Women's rights and education activist Malala Yousafzai is shot three times by a Taliban gunman as she tried to board her school bus in the Swat district of northwest Pakistan

DAILY SQU-EEK

If You Were Born Today, October 9
You are a study in contradictions. Although compassionate, humanitarian, and egalitarian at least in theory, you can also be domineering when the mood strikes you. Your moods and behavior swings can be frustrating for others (and for yourself!) at times, but they also help fuel your powerful creativity. You love debate and you have a way with words. You are not tolerant of narrow-minded thinking. You possess considerable strength of character, and partnership is extremely important to you. You live by your own truth and you are responsible. Famous people born today: John Lennon, Sean Lennon, Adam Sandler, Hugh Grant, John Entwistle.
john lennon would have celebrated his 75th birthday today
| Picture of the day | |
 |
The Zürich Opera House is an opera house in the Swiss city of Zürich. Located at the Sechseläutenplatz, it has been the home of the Zürich Opera since the current building was completed in 1891. It also houses the Bernhard-Theater Zürich.
|

Big Break
Photograph by Marco Nuno Faria, National Geographic
An immense wave crashes against the Felgueiras lighthouse in Porto, Portugal. Marco Nuno Faria says the image wasn’t easy to capture, but with some tenacity—and a bit of luck—the shot was his. “I studied the waves’ behavior for several days before this shot,” he writes, “and realized this spot was particularly interesting since I could, if I was lucky, get three simultaneous waves smashing into the breakwater. And I did it! But I had to wait for about two hours or a little more.”
knit, halloween
 | |||||||
Witchy Hands pattern by Kim Hamlin
This spooky project completes your Halloween witch costume! Featured in the October 2010 issue of YarnPlay, designed by Kim Hamlin. (Lion Brand Yarn)
| |||||||
Preview by Yahoo
| |||||||
knit
 | |||||||
Highland Tears pattern by maylin Tri'Coterie Designs
A hat that can be knit snug or slouchy. the band is knit sideways to give a well fitting, elegant edge. Stitches are then picked up to knit to the crown in the He...
| |||||||
Preview by Yahoo
| |||||||
knit
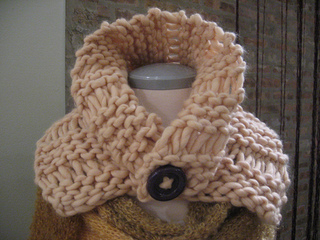 | |||||||
extra chunky neck warmer pattern by Breean Elyse Miller
A quick winter project that would be great for easy gift giving!
| |||||||
Preview by Yahoo
| |||||||
knit
 | |||||||
Rav Day Lace Workshop Scarves pattern by Elizabeth Lovic...
scarves without tassels take about 50 g yarn. The tassels take about an extra 10 g
| |||||||
Preview by Yahoo
| |||||||
knit
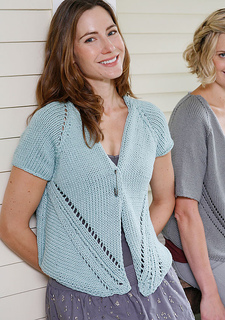 | |||||||
Quonset Chunky pattern by Norah Gaughan
Fans of Moshup will appreciate Quonset Chunky, a warm weather version of this innovative cardigan knit in Weekend Chunky. Subscribe to KnitBits for a week...
| |||||||
Preview by Yahoo
| |||||||

crochet, halloween
 | |||||||
Witch or Wizard Hats pattern by Lily / Sugar'n Cream
The finishing touch to witch, wizard, and warlock costumes. (Sugar’n Cream)
| |||||||
Preview by Yahoo
| |||||||
crochet

crochet
crochet
 | |||||||
Crocheted Gloves pattern by Sue Norrad
hook it! add to faves to queue About this pattern Crocheted Gloves by Sue Norrad average rating of 4.3 from 19 votes average difficulty from 23 ratings 68 ...
| |||||||
Preview by Yahoo
| |||||||
crochet
 | |||||||
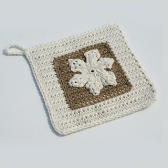
Apple Purse pattern by Amy Solovay
The apple design is made separately and then stitched to the body of the bag. If you would like to make the apple applique but not the bag, there's a free pat...
| |||||||
RECIPE (diabetic)
thanks, janice
diabetic fruit cake
1 Kilo of dried mixed fruit
2 cups of pure fruit juice or tea or coffee
2 cups of self-raising flour
Soak fruit overnight, stirring occasionally
then when you're ready to cook on the next day:
add the flour & mix put in to a large cake tin put in a pre-heated oven (325 degree) for two hours
nuts can be added.
also if you want to, after cooking, prick & brush with a spirit if you want to for a Christmas cake

CROCKPOT RECIPE
stephanie o'dea
Baked Brie CrockPot Recipe
 One of my most-requested and best-received crockpot appetizers is brie with candied pecans and cranberries. I like making it, because it's so gosh darn easy and because it seems more involved and elegant than it really is.
I was reminded about baked brie in a pastry crust last week when I was thumbing through and old cookbook put out by Pillsbury. I had a wheel of brie in the fridge, and thought I might as well try to do it in the crockpot.
The Ingredients.

The super easy way:
--a wheel of brie
--refrigerated crescent rolls
The Gluten Free Way (or a home-made way of making crescent rolls):
from the best crescent roll recipe ever, thanks to Delightfully Gluten Free
--1 /4 cup butter
--3/4 cup small curd cottage cheese or sour cream
--1 cup Gluten Free Flour mix (I used Pamela's) or All-Purpose Flour
--1 t xanthum gum (omit if using AP flour)
--1/8 t salt
--1/4 t cream of tartar
--1/2 t baking soda
--1 T sugar
--wheel of brie
The Directions.
If making the dough at home, follow the tutorial from the Delightfully Gluten Free site. I used sour cream the first time I made this dough, but used the cottage cheese this time. Both types of dough were delicious.
Roll out the chilled dough or crescent rolls on a cutting board. Don't tear apart the little crescent
 roll triangles, keep them together. I didn't bother to use an actual rolling pin, I just squished the dough down with a piece of plastic wrap. Place the wheel of brie in the center and fold the dough around the edges. If you have enough dough to cover the top, go for it. I did not, and left a peek-hole.
Cover and cook on high for 3-4 hours, with a toothpick wedged in the cover for just a bit of a vent hole. I usually use a chopstick, but tried a toothpick this time. I did get some condensation on the lid, but was pleased with the results. Your brie will be done when the dough has browned on top, and begun to pull away from the sides of the crockpot, or dish.
 I put the brie and the dough directly into my 4qt crockpot and baked it like that. In retrospect, I should have put the brie into an oven-safe round dish, and then put it into the crockpot for easier removal. I was able to get it out, but it wasn't very pretty. There may have been some bad words said.
The Verdict.
Oh Em Gee. Delicious, and very fun to make and present. I am overjoyed to have found this gluten free dough, and was so happy to give a nice big slice of this to my kids. They hated the cheese but liked the dough.

CRAFTS


CHILDREN'S CORNER .... cooking
Sugar Meringue Candy Dots
runningwithglitter

First, cut plain printer Paper into 2.5 X 11 inch strips
Prepare your Ingredients..
 2.5 cups of Powdered Sugar
2 egg whites (or powdered egg whites mixed per box directions)
Food Coloring. I used a pastel set


I did not have any powdered sugar on hand so I made my own. I have a Blendtec blender and use it for EVERYTHING! VERY COOL!

Mix Powdered sugar and egg whites for 5 minutes with a mixer
Divide batter into 4 baggies {or however many different colors you are going to do}
Add food coloring to each bag and mix in bag. This will save you the huge mess of mixing in bowls and transferring to baggies later.Clip corner of baggie and pipe a line of candy. Squeeze from the top like you would toothpaste.

Let your candies dry for 12 hours and have fun!!! or see below..........

DIRECT FROM USDA:
What part of the egg carries the bacteria?
Researchers say the salmonella bacteria are usually in the yolk or yellow. But
they can't rule out its presence in egg whites. So everyone is advised against
eating raw or under cooked egg yolks, whites or products containing them.
So...
Bake at 225 for 15-30 minutes. Make sure they do not brown. This also speeds up the drying process so you don't have to wait the 12 hours it takes for them to dry
-OR-
Use Powdered Egg whites

They turned out
SUPER fun any surprisingly yummy!
Next time I'll add a little flavoring just for fun.
They were like mini meringue bites.
Baking them gave them a little puff.


PUZZLE
Preview by Yahoo
| |||||||
QUOTE


just write pc on that cat .. lol

"Welcome" in Ewe (Ghana, Togo) - Weizo

CLEVER
How to Sharpen Scissors
wikihow
Over time and with consistent use, all scissors will eventually dull and loose the sharp edges they once possessed when you first bought them. If you are having trouble cutting with dull scissors, you might consider going out and buying another pair, since scissors are relatively inexpensive. However, there are several ways you can sharpen your scissors at home that only require a few common household items, and a little bit of practice.
Method 1 of 5: Sharpening Your Scissors With Sandpaper
 1Obtain a piece of sandpaper. A sandpaper sheet with 150-200 grit will work just fine, but you could even go for a little bit of a rougher grit (small grit number). Fold the sandpaper in half, with the rough sides facing outward.
- Have the rough edges face outward, so the sandpaper grazes against the blades as you cut the paper.

 2Cut through the sandpaper. Cut through the sandpaper, cutting long strips, about 10-20 times.[1] You will notice that the blades become sharper with every strip of sandpaper cut. Use full scissor strokes, cutting beginning at the base of the scissors and extending to the tip.
- Cutting through sandpaper is good for scissors that aren’t horribly dull, but just need some touch up sharpening.
- The sandpaper also helps smooth out nicks on the blades.
- Some alternatives cutting materials to sharpen scissors are emery cloth and steel wool.
 3Wipe down the scissors. Wipe down the blades of the scissors using a damp paper towel to clean off any sandpaper bits that may have collected on the blades while sharpening the scissors.


Method 2 of 5: Sharpening Your Scissors With Aluminum Foil
 1Obtain a piece of aluminum foil. Take a piece of aluminum foil, about 8-10 inches long, and fold it lengthwise multiple times so you have a thick strip of foil.
- The added layers of the aluminum foil will help grind the blades of the scissors multiple times with every cut of the foil.
-
2Cut the foil. Cut strips of the aluminum foil with your scissors until you have cut the entirety of the thick aluminum strip. Use full scissor strokes, cutting beginning at the base of the scissors and extending to the tip.
- Depending on the width of the strips you cut, you can sharpen your scissors blades a lot (by cutting many, skinny strips) or just a little bit (by cutting a few, thicker strips).
 3Wipe down the scissors. Wipe down the blades using a paper towel dampened by warm water. This will get rid of any aluminum debris that may have clung to the blades as you were cutting.


Method 3 of 5: Sharpening Your Scissors With a Sharpening Stone
 1Obtain a sharpening stone. Sharpening stones can be found at most hardware stores, and can be used to sharpen any blade you have. Sharpening stones normally have two sides used for sharpening blades: a coarse side, and a fine side.
- If you have very dull scissors, you should start out using the coarse side of the stone, and then move over to the finer side to finish.
- If your scissors just need a light sharpening, you only need to use the fine side of the stone.
 2Prepare the sharpening stone. Lay your sharpening stone on a towel and lubricate it with either water or honing oil.
- Stores sell honing oil in the same area that they sell sharpening stones, but any oil, or even water, works just fine for lubricating the stone.
 3Disassemble your scissors. Remove the screw that holds the scissors’ blades together. You do this so you can sharpen each blade separately, and have more mobility when sharpening the blades.
- More often than not, a flathead screwdriver small enough to fit in the screw’s head will work in unscrewing the scissors’ blades from each other.
 4Sharpen the inner side of the blade. Place one blade of the scissors on the stone with the inner side of the blade (the flat, inside part of the blade that comes in contact with the material you’re cutting and the opposite inside part of the other blade), facing down. You want to create a nice, sharp angle between the inner blade (the part you’re currently sharpening, and the cutting edge (the top edge to the inner side of the blade). Where those two edges meet, is the area that needs to be sharp to cut things. Grip the handle of the scissor blade, and slowly pull the blade across the stone toward you, keeping the edge of the blade flat against the stone.
- Repeat this action slowly and carefully until the blade has been sharpened. This should take about 10-20 pushes.
- Repeat this step with the other blade of the scissors. [2]
- You should practice on some old scissors until you fully get the hang of how to sharpen blades.
 5Sharpen the cutting edge of the blade. Grip the handle of the scissor blade, and tilt the blade toward you until the cutting edge (the beveled edge that meets the inner side of the blade) lies flat on the stone. With the blade horizontal to you, slowly pull the blade across the stone toward you, keeping that beveled edge flat against the stone. Match the angle as closely as possible and continue to slide the blade forward. Repeat this action carefully until the blade is sharpened.
- If you started on the coarse side of the stone, finish with a few swipes on the finer side of the stone to give a nice, smooth finish.
- If you have never sharpened scissors this way before, you might find it difficult to judge when the edge of the blade is completely sharpened. Before starting, run a permanent marker across the blade edge. When the marker has disappeared, you’ve sharpened the entire blade.[3]
 6Remove the burrs on the scissor blades. Once you’ve finished using the sharpening stone, there will be a fine edge of burrs along the blade that need to be removed. Reassemble the scissors by screwing the blades back together, then open then shut the scissors a few times. Cut through a piece of material the scissors were made for (fabric, paper, cardboard, etc.), to knock off the burrs from the blades.
- If you’re happy with how sharp the scissors are, you’re finished. If not, repeat the process.[4]
 7Wipe down the scissors. Using a damp paper towel, wipe down the blades of the scissors to clean off any stone bits that may have collected on the blades while sharpening the scissors.


Method 4 of 5: Sharpening Your Scissors With a Glass Mason Jar
 1Slide the scissor blades around the mason jar. Open the pair of scissors as wide as they can go, and position the blades around the sides of the mason jar.
- The jar should be as far as it can go between the two blades. Hold the jar with one hand, and the scissors with the other hand.
 2Cut the mason jar. Squeeze the scissors closed, and slide the mason jar out from between the blades as the scissors close.[5] This is the same way you would close the scissors if you were cutting paper or fabric. Use light pressure to close the scissors, let the glass do the sharpening work for you.
- Repeat this process until the blades have a smooth, clean edge.
- Be sure to use a mason jar that you don’t mind damaging, because the blades of the scissors might leave scratch marks on the jar.
 3Wipe down the scissors. Using a damp paper towel, wipe down the blades of the scissors to clean off any microscopic glass pieces that may have collected on the blades while cutting the mason jar.


Method 5 of 5: Sharpening Your Scissors With a Pin
 1Obtain a sewing pin. This method follows the same principle of using a mason jar to sharpen your scissors, while utilizing a smaller tool.
 2Cut the pin. Squeeze the scissors closed, and slide the pin out from between the blades as the scissors close.[6] This is the same way you would close the scissors if you were cutting paper or fabric. Use light pressure to close the scissors, let the metal pin do the sharpening work for you.
- Repeat this process until the blades have a smooth, clean edge.
 3Wipe down the scissors. Using a damp paper towel, wipe down the blades of the scissors to clean off any metal bits that may have collected on the blades while cutting the pin.


EYE OPENER
thanks, susie: west coast correspondent


Your welcome on the cake, we also added nuts plus halved the quantity when we wanted a smaller cake
ReplyDeleteHugs Janice